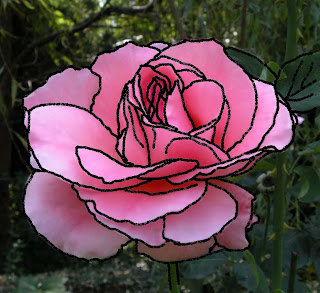
Even if you have a needlepoint program, and especially if you've never taken art lessons, it's a good idea to start doing your own designs by...More......tracing over a photo. Why? because it helps you concentrate on the STRUCTURE of the object in question, a fundamental feature to achieve convincing results, as opposed to being bewitched by small details. It also helps you realize just how complicated translating a photo into a design is, so it helps you learn to pick images that better lend themselves to this transformation.
In this photo I snapped a couple of years ago, I outlined for you the principal structural parts of the flower, stem and leaves (choosing to leave out the smaller leaf in perspective, as it would be harder to understand in a needlepoint). The larger areas of shadow and light also have been outlined because they are indicative of structure. Smaller details, such as teeny defects in the lips of the petals, were ignored. If you have a spare copy of the photo, you can outline directly on it. If you don't, and if there's nothing confusing on the other side of the page, you can put the photo up against a sunny window, put a piece of tracing paper over the photo, and trace on the tracing paper. Once this is done, set down the photo, put the traced design against the sunny window, and your canvas over the traced design. KEEPING STITCHING TECHNIQUE IN MIND, trace the design in pencil, or waterproof felt-tipped pen (beware that dark colors of pen might show through a light-colored yarn!).
What do I mean by keeping stitching technique in mind? See my post and diagram on stitching techniques.
No comments:
Post a Comment